bill@tonglepacking.com
0086-158-5898-7746
How to Make Gift Bag?
How to Make Gift Bags

Step 1: Determine Size
Look at the gift you want to wrap and estimate the size of the bag you will need. You can do this by drawing a rectangle around the gift on a piece of scrap paper and then measuring the gift's height. Stack books until the side of the book stack is the size of the rectangle you drew or larger. You may need to make two or more stacks of books side-by-side if your gift is large.
This stack of books will be used as a form to create the bag. You can also use a box or a stack of boxes as a form.

Step 2: Cut Wrapping Paper
Cut a sheet of wrapping paper to use in making the bag. In one direction, the paper should be the desired height of the bag plus 3/4 of the bag's depth, plus 1 inch extra (2 cm). In other words,the paper measurements should be the height of the bag plus enough paper to fold over the end of the stack of books, plus 1 inch. In the other direction, the paper should wrap around the stack of books, with 1/2 inch extra (1 cm) for overlap.
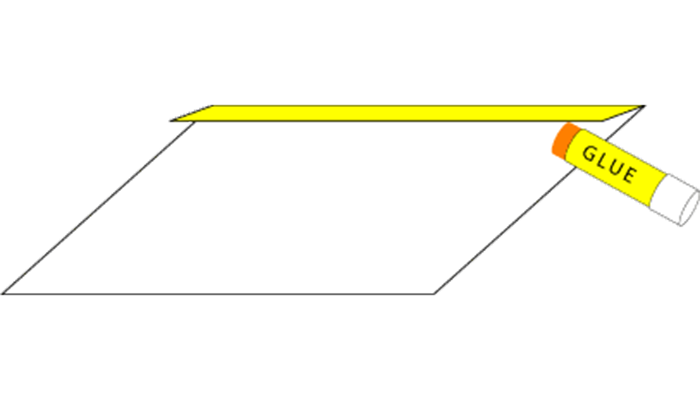
Step 3: Fold Top Edge
Place the wrapping paper right side down. Fold back 1 inch (2 cm) along the top edge, crease, and glue in place.
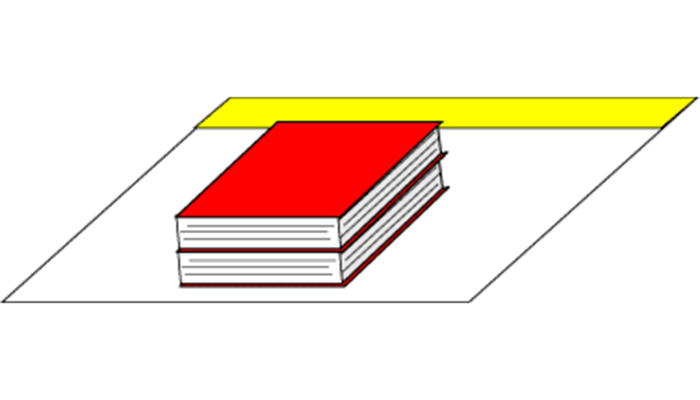
Step 4: Books on Paper
With the wrapping paper right side down, place the stack of books in the center of the paper near the bottom edge. Be sure that the stack sits above the bottom edge by about 3/4 of the stack's height.

Step 5: Wrap and Glue
Wrap the paper around the stack and secure the seam with glue or tape. Be sure that the top edge meets evenly at the seam.
Be careful not to wrap too tightly, or it will be difficult to remove the stack of books from the bag.
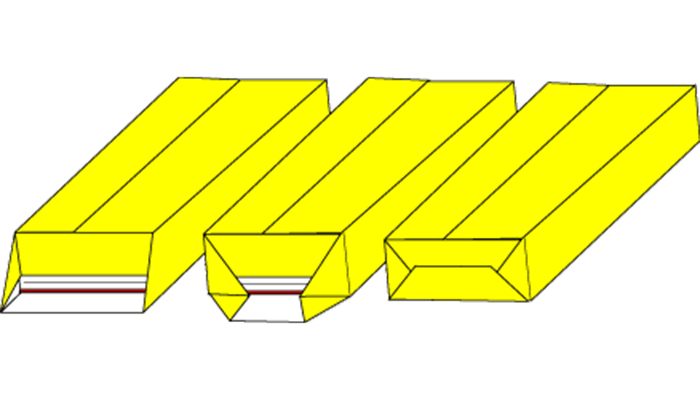
Step 6: Form Bag's Base
Make the bag's base by folding the paper over one end of the stack of books like you are wrapping a box. Run your fingers down each edge of the stack to crease the bag's corners. Remove the stack of books from the bag.

Step 7: Fold Gusset (optional)
To make gusseted (pleated) sides on the bag, pinch the sides of the bag together and crease down the middle of the side. Do this on both sides of the bag.
You may also fold the bottom of the bag up and crease it flat—like a grocery bag. This will allow the bag to be stored flat.
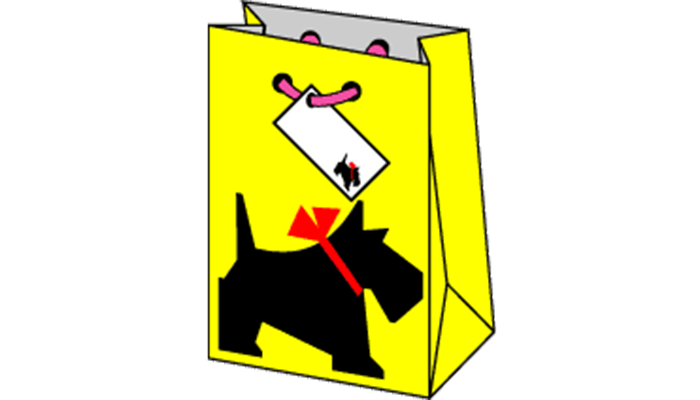
Step 8: Finishing Touches (optional)
· Make the bag stronger by reinforcing the bottom with a piece of cardboard cut to size and placed in the bottom of the bag.
· To add a ribbon to tie the bag closed, punch two holes in the top of the bag, while holding the front and the back together. Thread ribbon through the holes. Make the holes stronger by adding notebook reinforcing rings.

· If you used solid-colored wrapping paper, you may want to decorate the bag. You can color it, stamp it, or apply paper cuts. Make your own paper cuts, or print one of these Scottie dog or flower appliqué sheets.
- Full Name:
- BILL
- Tel:
+86 15858987746
+86 579-89928979
- Email:
- bill@tonglepacking.com
- Address:
- RM 603,6TH FLOOR,NO.399 YINHAI ROAD YIWU INTERNATIONAL BUSINESS CENTER YIWU,ZHEJIANG,CHINA